
GoTo Meeting Organizer Guide
Get started with the new
GoTo app!
Download and sign in to your account
Download the
GoTo app to being using your
GoTo Meeting account. If you
do not want to download the desktop app, you can manage your
meetings at https://app.goto.com/meetings on a Google Chrome or Microsoft Edge Chromium browser.
- Download the GoTo app and go through the installation flow.
- Sign in using your GoTo Meeting credentials.
View account overview
You can schedule, start, and manage
meetings from the
GoTo app or at
https://app.goto.com/meetings.

- (1)Create a one-time or recurring rooms meeting
- (2)Start an instant meeting
- (3) Start your own personal meeting room
- (4)Join someone else's meeting
- (5) View upcoming meetings
- (6) View recurring room meetings
- (7) View past meetings, recordings, and meeting diagnostics
- (8) View meeting details and start it
- (9) Copy meeting invite to send to others
- (10) Edit or delete the meeting
- (11) Search for invited attendees
- (12)Add the meeting to your calendar or download it as a ICS file
- (13) Access your meeting settings, leave feedback, get additional help, and sign out
- (14) View all meetings in calendar form (must sync calendar to the GoTo app)
Create a meeting
To schedule a one-time or recurring
meeting, select
Create meeting.
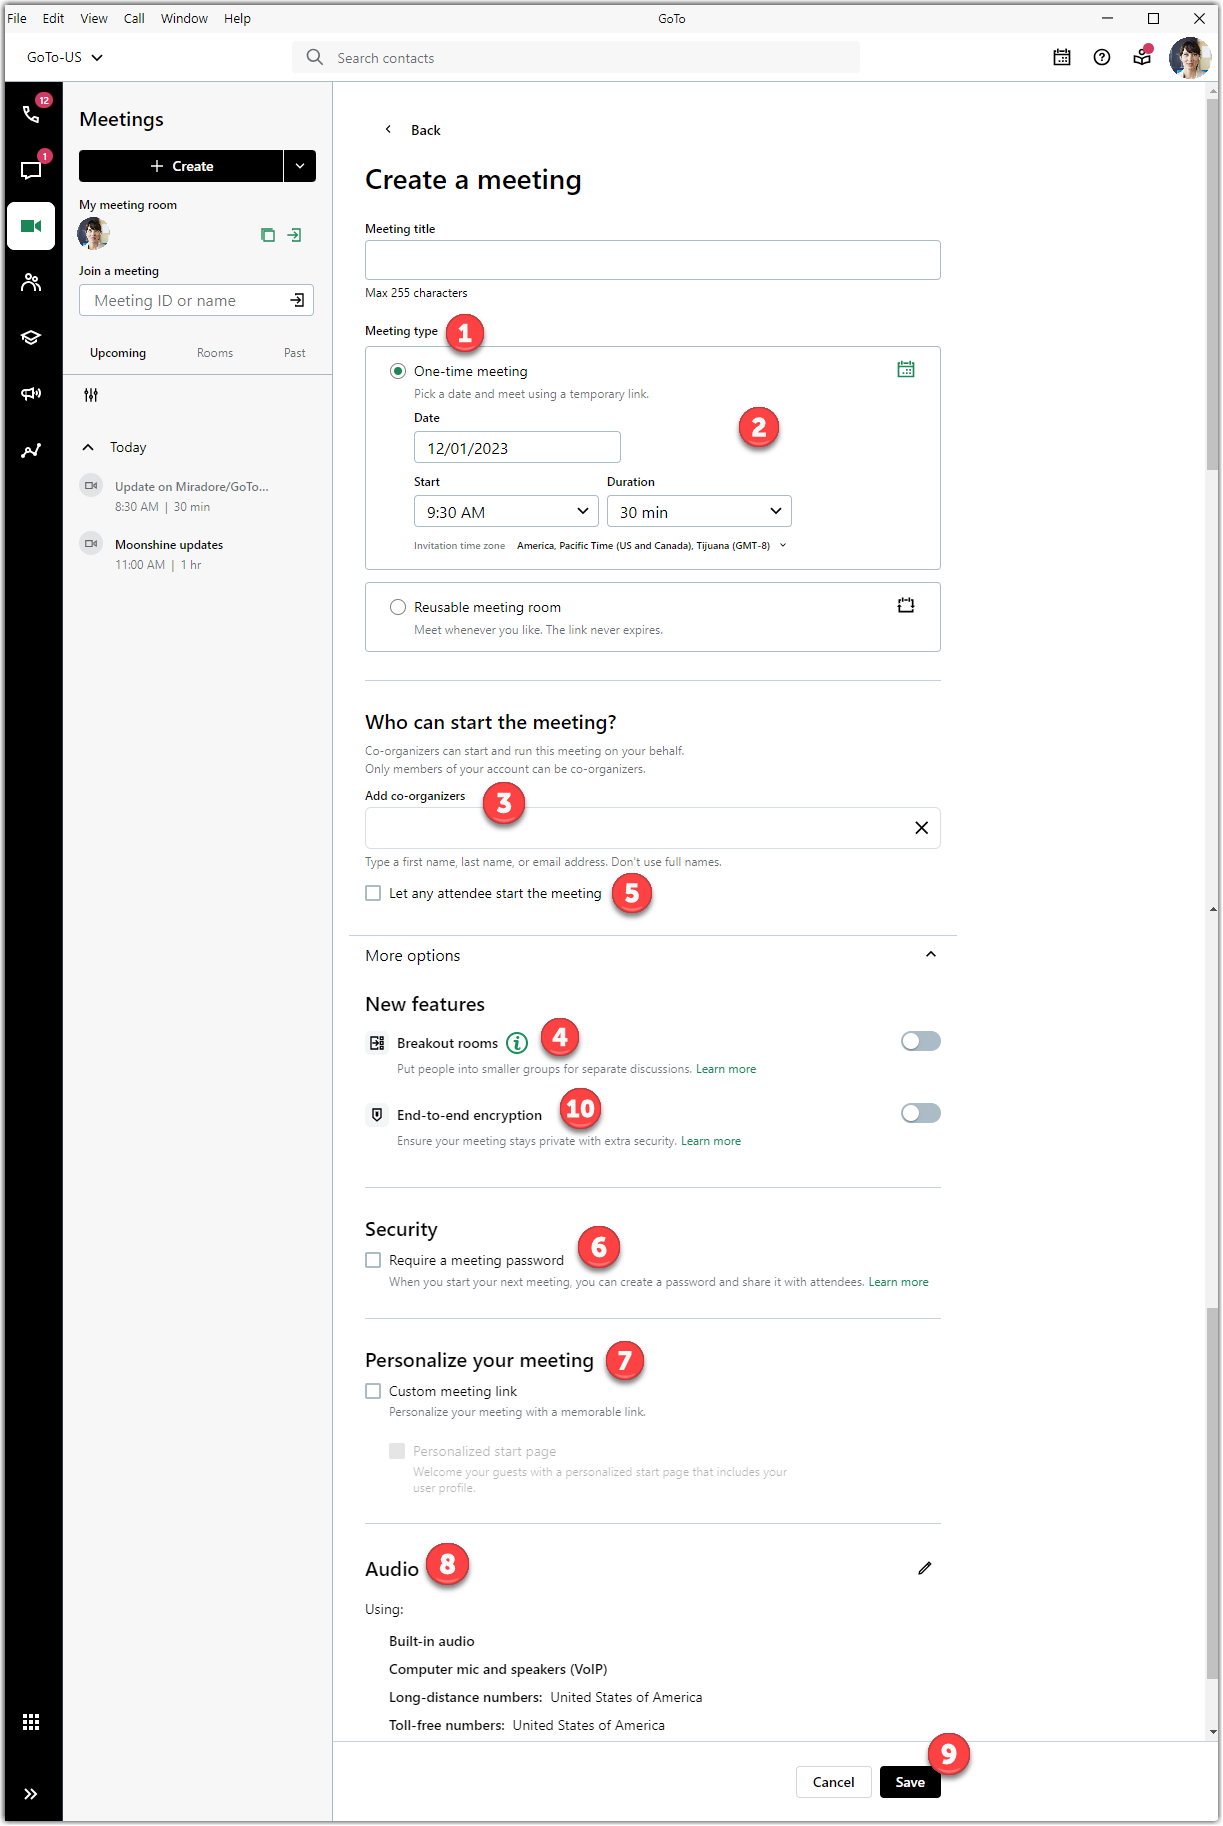
- (1) Choose the meeting type
- (2) If scheduling a one-time meeting, choose the meeting date and time
- (3)Add a co-organizer (must be a member on your account)
- (4)Use breakout rooms during the meeting
- (5) Allow attendees on your account to start the meeting without you
- (6)Password protect your meeting (please note you will not be able to record your meeting if it is password-protected)
- (7)Personalize your meeting with a custom link
- (8) Edit audio options
- (9) Save the new meeting
- (10) Encrypt your meeting
Start or join a meeting
There are several way you can start your own
meeting and join other
meetings. In the
meeting invite (sent via email, chat, etc.), select the meeting link. Alternatively, you can join from GoTo.
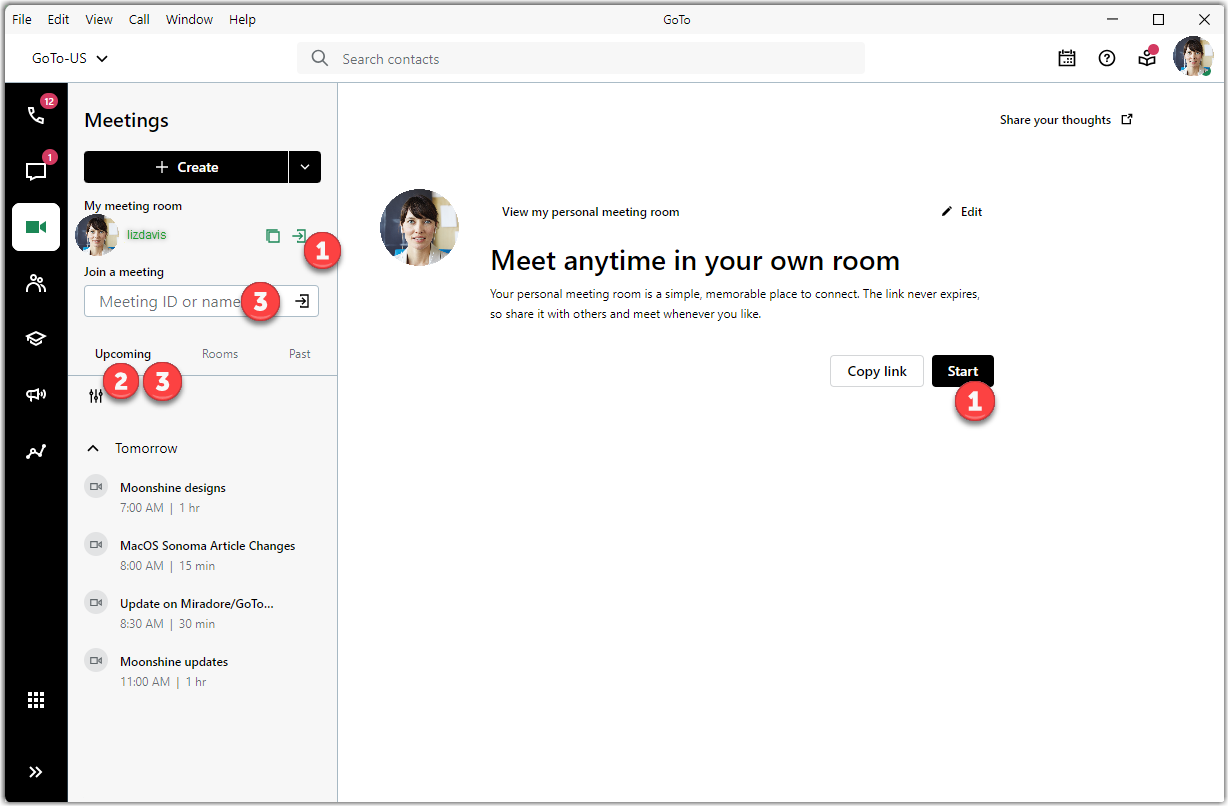
- (1) Start your own personal meeting room
- (2) Start or join an upcoming scheduled meeting
- (3) Join someone else's meeting (you must need their ID or room name)
Use the Control Panel
The in-session control panel provides you with access to all of the features and tools that
GoTo Meeting offers.
Notice: This article addresses the new GoTo app experience. View How do I use the Control Panel? (Classic) for the classic experience.
- (1) View session details
- (2) Lock your session (only available for GoTo Meeting)
- (3) Change and rearrange your camera feed view
- (4) View the list of attendees
- (5) Chat with others
- (6) Access session settings such as switching your audio mode, previewing your camera, and other general settings
- (7) Get more help
- (8) Start breakout rooms (if enabled)
- (9) Invite others to the session
- (10) Record the session
- (11) Raise your hand or use quick reactions (if enabled)
- (12) Mute and unmute yourself
- (13) Share your camera
- (14) Share your screen
- (15) Leave or end the session
- (16) Manage attendees
- (17) View raised hands as an organizer

View FAQs
Read through the frequently asked questions about the new GoTo app.
What features are not available in the new GoTo app?
The following features are not yet available on the GoTo app:
- Convert local recordings from .WEBM files
Do I need to uninstall the classic version of the GoTo Meeting desktop app?
We recommend you keep the classic version of GoTo Meeting installed on your computer especially if you are a webinar or training user.
When am I going to see other products (like GoTo Webinar and GoTo Training) in the GoTo app?
Webinars and trainings are available in the GoTo app! If you're an organizer, you can start hosting webinars and trainings in the new app.
If you have a GoTo Webinar and/or GoTo Training license, you can access them directly from the product:
- If you have a GoTo Webinar account, please sign in at https://dashboard.gotowebinar.com.
- If you have a GoTo Training account, please sign in at https://global.gototraining.com
What browsers are supported?
We support the latest 3 versions of the following browsers:
- Google Chrome: Download the latest version.
- Microsoft Edge Chromium: Download the latest version.
