
How does GoTo Resolve Endpoint Protection Empower End-users?
The end user present at the device can perform the most essential actions from the GoTo Resolve Endpoint Protection window.
Remember: This feature is not available with a trial subscription. Check out which subscription you need to get the most of GoTo Resolve.
To open this window, select the
Endpoint Protection icon
 on the system tray. This window contains the same information as the Console; when an admin or an agent performs an action remotely, those actions are logged in the
GoTo Resolve Endpoint Protection window.
on the system tray. This window contains the same information as the Console; when an admin or an agent performs an action remotely, those actions are logged in the
GoTo Resolve Endpoint Protection window.
End-users can do the following:
- View endpoint protection events that were performed on the device
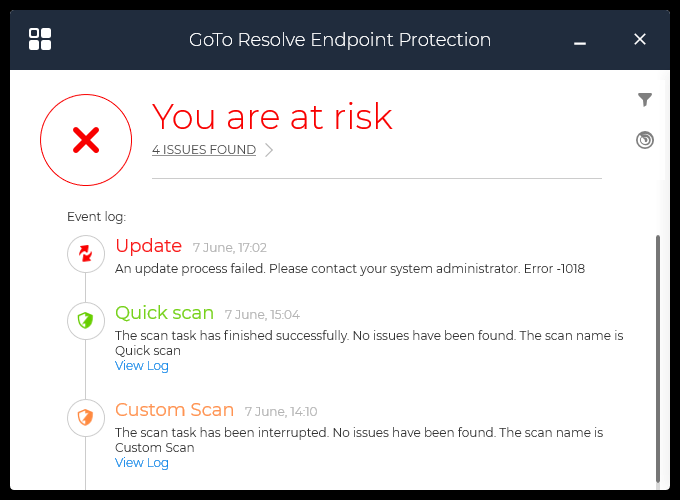
- The main GoTo Resolve Endpoint Protection window lists all past Endpoint Protection events that occurred on the device. These events include the actions of both the end user and agents.
- Run quick, full, or custom scans
-
Click the
Scan Tasks icon on the right, to scan your device for threats. Depending on how thorough you want to scan your device, you have the following options:

- Quick scan - Scans the following areas:
- Does not scan archives
- Scan for adware
- Scan boot sectors
- Scan for dialers
- Scan for key loggers
- Scan for spyware
- Scan for known malicious applications
- Full scan - Scans the following areas:
- Deep scan of archives
- Scan boot sectors
- Scan cookies
- Scan for rootkits
- Scan memory
- Scan registry
- New custom scan - Allows you to customize your scan:
- Target - Select the drive that you want to scan for threats
- Scan Options - Select the mode of your scan. An Aggressive scan takes more time to run but does a more thorough job. A Normal or Permissive scan runs faster, but performs a more superficial job. A Custom scan allows you to tailor the scan very specific to your needs. Read the description for each mode to select the one suits your device best.
You can also save your custom scan as a favorite by naming it in the Save favourite scan field. You can also make sure the scan uses less resources by running it with low priority. Scans running with low priority take longer to finish.
Click Start scan when you are done.
- Quick scan - Scans the following areas:
- View the log of previous scans
-
On the main page, click
View Log under a scan that has finished.

- Quarantine threats
-
You can quarantine files that are infected with malware. Click the
Modules icon
 in the top-left and then click
Quarantine.
in the top-left and then click
Quarantine.
- Manage firewall rules
- The device must have a firewall enabled to use this feature.
Article last updated: 4 April, 2024