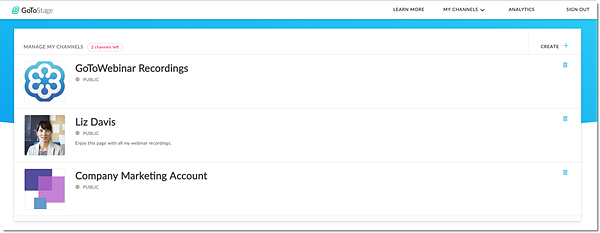
Manage your GoTo Stage channel
A channel page is your personal online hub where you can instantly publish webinar recordings to audiences all over. Depending on your subscription plan, you may have more than one channel page available with your account. You can customize and organize your channel in various ways to match your brand and preference.

- Sign in to your account at https://dashboard.gotowebinar.com.
- Select
 .
. - Make any of the following changes as desired:
Desired change Instructions See availability of channels Next to My Channels at the top of your Manage Channels page, you will see the # of channels you have left. Create a new channel Select Create +, enter your new channel information, and then select Create again. Make any further customizations as desired below. Update privacy settings Select the Settings icon next to the desired channel and then enable/disable the Privacy setting to your preference. Select Save when finished. Note: Enabling this setting will prevent your videos from being listed and searchable on GoTo Stage. Viewers can only access the channel from a direct link.Customize the URL Select the Settings icon next to the desired channel and then enter the desired keywords to the end of your channel link under Custom URL. Select Save when finished. Add a custom disclaimer Select the Settings icon next to the desired channel, enable the Custom registration disclaimer setting, and then enter the desired text. Select Save when finished. Notice: Adding a registration disclaimer to your video will require all viewers to accept the disclaimer before watching the video.Edit name/description Select the name or description box, enter the desired text including hyperlinks in the description field, and then click out of the text field to save the changes. Add/update branding — Includes banner and logo images, and color theme From the desired channel, select the following options: - Edit Banner > Change banner image to change the image displayed at the top of your channel. You can select an included image or upload a custom image (recommended dimensions are 2640 x 440 pixels) as well as change the color theme. Click out of the box to save the changes.
- Hover over your current channel logo above your channel name and then select Add or Edit Logo > Upload new logo. Select the desired file to upload (recommended dimensions are 160 x160 pixels) and then select Save when finished.
Troubleshooting: If nothing happens when selecting the edit options above, it's possible your network has blocked FileStack, a third party service GoTo Stage uses. Reach out to your IT administrator and ask to allowlist *filestackapi.com.Manage (and add) videos on channel See the following: Share channel Under your channel name and description, select one of the following ways to share: - Social media feeds — This opens a pre-populated post in another browser on the desired platform.
- Unique URL — Copy the generated link (or customized link) and paste it wherever you'd like.
View/export channel analytics From the desired channel, select the User icon in the top right and then select Analytics from the main-drop down menu. A new browser tab will open with all available data related to your channel such as the total number of views, top watched videos, total social media shares, and more. If desired, the following reports are available for exporting: - Video details — Under My Videos, select Export to download a detailed .CSV file of all videos on that channel, including the title, publish date, view and share counts, video length and average watch time.
- Viewer details — Under My Videos, find the desired video. Select the video title or the number of views and then select Export to download a detailed .CSV file of all viewers for that video, including first and last name, email, last watched date, watch time, and watch count.
Delete channel Select the Trash icon next to the desired channel and then select Yes, delete to confirm. The videos from that channel will be moved to the Unpublished tab and the custom URL (if applicable) will be unavailable for future use.

