Add Your Identity Provider to the Organization Center
The Identity Provider tab within the Organization Center lets you configure your Identity Provider (IdP) relationship to establish Enterprise Sign-In (SSO) for your organization's users. Whichever single sign-on configuration method you choose, you must finalize the relationship with GoTo using the Identity Provider tab to complete the setup.
You can set up this configuration either automatically or manually – you cannot do both. If you save one after the other, the last save is accepted.
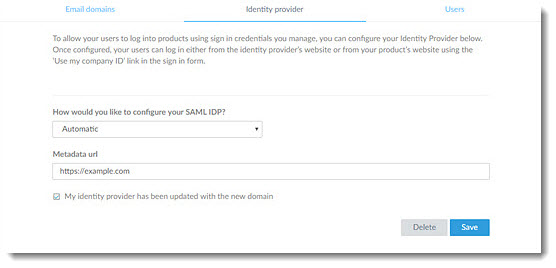
Add Your Identity Provider Automatically
The easiest and most robust way to configure SSO is to use a link to your Identity Provider's metadata file if they provide one. The metadata contains additional information that the IdP can use to make the transaction more secure. In addition, since the metadata file is generated, the method is less prone to typographical errors.
Once your IdP has been added, you are all set! You can now sign in with your Company ID using single sign-on.
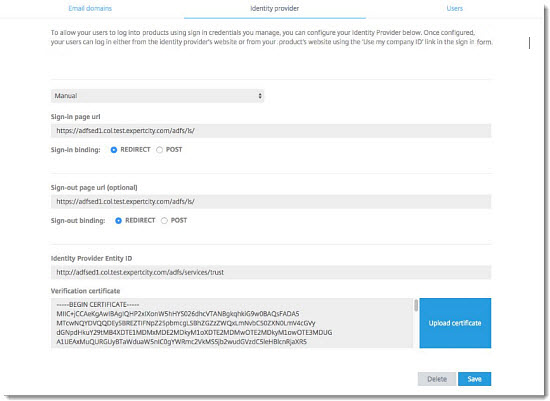
Add Your Identity Provider Manually
Not all IdPs support a metadata implementation. To set up a manually configured IdP relationship, you enter key data that will get built into the SAML assertions.
Once your IdP has been added, you are all set! You can now sign in with your Company ID using single sign-on.