

About device groups
Device groups allow you to manage devices that share similar attributes. You will need your signature key to create a device group, to add devices to a device group, and to move devices from a device group to another one.
Creating new device groups
By default all your verified devices are shown in the
Individual devices list. You can organize your devices into specific device groups, for example setting up a group each for your home and office computers. To do so:
- On the Devices page select Manage groups in the top-right corner.
- Select Create new group.
- Enter the name of the group and click the tick icon.
- Enter your signature key and click Proceed.
- Select Assign agents if you want to assign agents to the group.
- The newly created group appears in the Device groups list.
Adding devices to your groups
- In the Console, go to the Devices page.
- Click Add new device in the top-right corner.
- Enter your signature key and click Proceed.
- Select an Installer type:
- Downloadable file: You will be downloading an installer file onto your computer.
- Shareable link: You will share a secure link with your end-users so they can download the installer matching their platform. Just copy and send them the shareable link.
- From the Device group drop-down list under Installer type select the group where you want to add your new device.
- Select Windows or macOS based on the operating system you use.
- If you selected the Downloadable file option previously, select the file format you want to use.
- Select Download to download the desktop installer.
- Open the downloaded file and install the desktop installer.
Important: Do not rename the downloaded installer because that prevents you from starting remote control sessions or run Remote Execution jobs on the deployed device.Note: Mass installer for Windows and macOS are not available in the Remote Support plan.
- Select Done.
For enhanced security, you should verify that the device belongs to your account. You can do so from the Devices main page or from the group where you have added your device.
Verifying your devices
When you add a new device to your device list it appears in the
Unverified devices list. You will see the details of the device but you cannot start a remote support session, launch terminal or the file manager on it, unless you verify it. When you verify a new device, you not only have full control over it, but extend the protective shield via your signature key to device management as well.
- Select a device or a set of devices from the Unverified devices list.
Tip: By clicking the top row of the Unverified devices list you can select every device in the list and verify them all, by clicking the Verify all button. You can verify up to 500 devices at one go.
- Click Verify.
- Enter your signature key to proceed.
- The selected device(s) will appear in the Not in a group list.
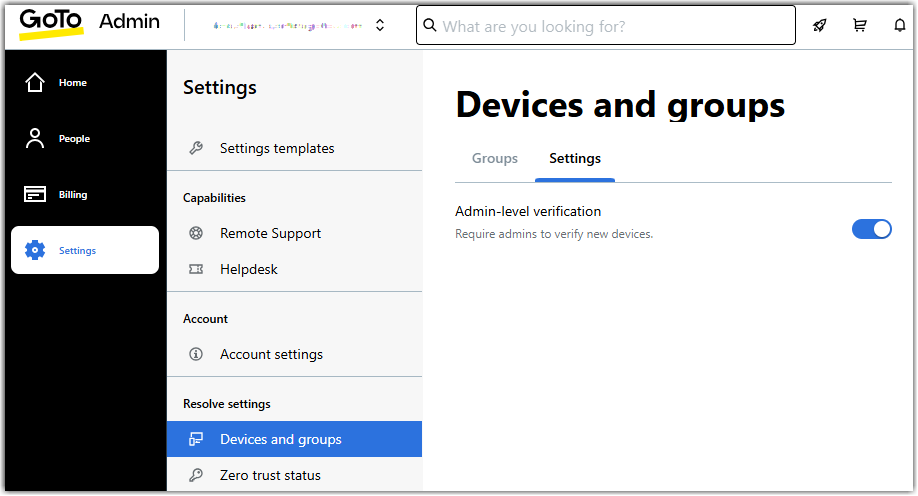
Tip: If Admin-level verification is enabled on your account, agents can add new devices, but only admins can verify them. To find this setting in GoTo Admin, go to and navigate to the Settings tab.
Moving devices to your groups
- Select a device or set of devices in the Individual devices list.
- Scroll down to Group in the Manage device panel that pops up on the right of the Console.
- Click Group and select the device group you want to add your devices to.
- Click Done.
- Enter your signature key and click Proceed.
- Your devices appear in the group you selected in the Device groups list.
Note: You can move a device to another group by selecting them and clicking Manage in their actual device group, and repeating the steps above.
Managing device groups
You can manage your device groups from the
Manage groups list:
- Hover your mouse over a device group and click the pencil icon on the right to edit its name.
- Hover your mouse over a device group and click the bin icon to delete it.
- Select Assign agents to assign agents or remove them from a group in GoTo Admin.
Note: You have to enter your signature key to implement the changes.
Article last updated: 30 July, 2025