
Manage User Sync rules
User Sync rules allow you to select a directory group and specify a group's users' product permissions and admin privileges.
You may have multiple rules for a given directory group (also known as organization group), and a user can belong to more than one group. If you have multiple rules, you can manage the priority of the rules, and if desired, map custom attributes to those rules. Once you enable and run User Sync, you can always modify or delete an existing rule.
Create your first rule or add a new rule
Create User Sync rules to tell the system how to provision the users sent from the Active Directory Connector to the admin portal (e.g., assigning products, roles, etc.).
- Select Save.
Result: You have created and configured your User Sync rules.

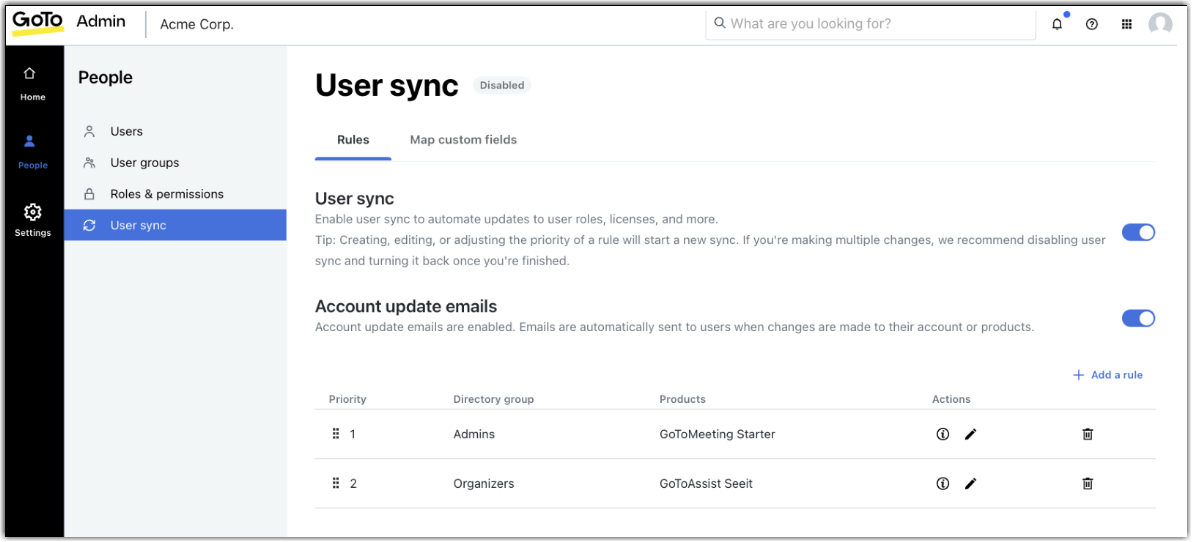
Manage Rule Priority
Manage the order of priority for your User Sync rules.
If you have multiple rules, you can select and drag on each rule to adjust the prioritization of the order in which the rules apply. The rule with the highest ranking (i.e., lowest priority rule number) takes precedence over subsequent rules, meaning Rule #1 takes priority over Rule #2.
If you have users that exist in one or more directory group, all assignments contained within the rule with the highest priority ranking will be used in favor of the same assignments contained in lower priority rule(s). Here are some examples:
- A user is in two directory groups with two rules assigned: Rule #1 is assigned User Group A and Rule #2 is assigned User Group B. Since only one user group can be assigned to a user, they will be assigned to User Group A from Rule #1 as it is ranked highest in priority.
- A user is in two directory groups with two rules assigned: Rule #1 is assigned Device Group A and Rule #2 is assigned Device Group B. Since you can have multiple device groups assigned to a user, the user will be assigned both Device Group A and Device Group B.
Note: Device group assignment is only applicable to accounts provisioned with GoToAssist Remote Support.
- A user is in three directory groups with three rules assigned: Rule #1 is assigned GoTo Meeting Pro, Rule #2 is assigned GoTo Meeting Plus, and Rule #3 is assigned GoToAssist Remote Support. The user will be assigned GoTo Meeting Pro (due to higher ranked priority of the rule) and GoToAssist Remote Support.
Note: For rules that contain more than one product tier (e.g., GoTo Meeting Pro and GoTo Meeting Plus), the rule with the highest priority ranking will be assigned, even if it is a lower-tiered product.
Map custom fields in User Sync
Once you have configured user attributes on your third-party identity provider's directory (and, if desired, created your own custom fields), you can map them in User Sync.
Enable and run User Sync
Once you have set up your rules and their prioritization, then you are ready to run User Sync.
Modify an existing rule
- Choose
 on the rule you want to modify and then make changes to the priority as needed.
 - Select Save when complete.
Delete an existing rule
Users within directory groups are never deleted. If all applicable rules for a user are deleted, the user becomes in "suspended" state, but their account and product-related data (e.g., upcoming meetings, stored recordings, etc.) are retained. Only the settings within the rule are removed from use while the users will remain on your account.
- Select
 to remove a rule.
